List of recording articles on this page
1) MIXING
A SONG ON A HARD DISK RECORDER
2)
Recording your songs
3)
Music Production and Mixing
Tips & Tricks
4)
Recording Drums - Miking Techniques Part 1
5) Home Recording Studio Basics -
Here's What You Need to Record
6)
Studio Singing & Vocal Technique
7)
Sing Powerfully
Without Strain or Vocal Blowout
8)
Preparing For Your Recording Session
9) Tips for a Great Recording Session
10)
The 5 Most Common Questions About Music
Mastering
11)
The Two Conflicting Paths of the
Mastering House
12) The Role of CD Mastering Engineers
13
Audio CD Copiers
14)
Copy CD's Like A Professional
15
Can't I just do my CD and DVD duplication at home?
16) Is
Your Band Ready For CD Duplication Or CD Replication?
17)
Recording Guitar - How to Mic a
Guitar Amp
| PLACE YOUR AD HERE
contact:webmaster@mycd.ca |
|
1)
MIXING A SONG ON A HARD
DISK RECORDER
by Art Rock MyCD.ca
Is a
hard disk recorder easier to use than music recording software on a
computer you ask. Yes it is, for the most part. Mixing a song on a hard
disk recorder is simpler and less confusing then it is to mix a song on
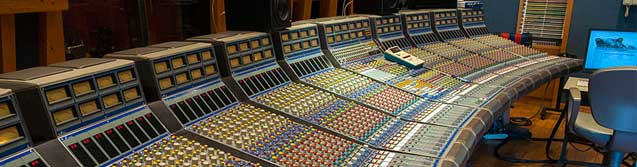
computer music recording software. On hard disk recorders you normally
have a mixing console built in, usually right on the exterior top of the
recorder. They usually have an individual volume level fader and panning
knob on each channel, right out in the open, easy to grab and tweak.
Some units even have EQ setting adjustment knobs right on the recording
console as well. Level, panning and EQ are some of the most important
steps in recording your song, mixing down your song and mastering your
song. They really are mandatory steps you have to perform. Having these
most used controls on the exterior recording console of the hard disk
recorder, makes it easier to use, than dialling in and cursoring left
right and up and down, on each individual track. Tweaking EQ can easily
occupy the majority of your time in mixing a song.
Most hard disk recorders also have a very large selection of built
in effects. With most units you can add different effects individually
on each track while recording your parts. You can then add different
effects again on each track on mix down. Most hard disk recorders have
built in effect send buses, where you can add reverb and delay to all
your tracks when you master the mix. Normally you can adjust from zero
to 100 percent wet effect applied on each track independently. Most hard
disk recorders also have built in mic preamps on each input channel.
Most have guitar amp simulators so you can plug your guitar directly
into the recorder without an amp. The other people in your household and
your neighbours may appreciate that feature more than you. Having the
ability to record, mix and master the song entirely in the digital
domain has the huge advantage of keeping background noise and ground
effect noise to a minimum. Any time you use external effects and gear
you always increase the chance of adding noise to your mix, although
quite often, the trade off is worth it.
All of the features mentioned here are also available on computer
software recording and more. You can get a much larger library of
effects, while remaining in the digital domain, on recording software by
adding plug-ins. There is no limit to how much you can add except for
how much you are willing to spend. Either way, hard disk recording, or
computer based recording, you can add
on external hardware, such as direct boxes, input strips, mic preamps,
effect units etc.
by Art Rock / MyCD.ca copyright Absolute Music 2021

------
Why is it Free and how you can support us.
All the articles and info we provide is completely
free to you. We get very small payments from the advertisers on our
website when you make a purchase from them, after clicking one of their
ads on our site such as Amazon, Ebay, Walmart etc. You won't pay any
extra for your purchase and you will help us keep it free. We also get a
very small payment when you click on an adsense by Google ad
----- ------ -------
2) Recording your songs
by
Art Rock MyCD.ca
You have a choice of going to a recording studio and paying to
have your songs recorded or you can record them yourself at home, in
your own home studio. With the price of recording gear coming down, the
price to record in a studio has come down from about $40. to $250. an
hour 10 years ago to about $15. to $75 an hour today. The low end of the
price range being a small studio, usually in some-ones home. The higher
price, a large studio operation or one known for recording famous
artists.
The most popular and affordable device
for home recordings through the 1960's and 70's was the two track reel to
reel recorder with a sound on sound function. Through the 80's and 90's it
was the four track cassette recorder. The cassette deck design made it extremely
easy to use and to figure out how to record your own songs. It used a standard blank cassette tape and had a record head capable of recording four separate tracks,
one at a time. For instance you could record a drum machine or drummer on track
one. Rewind the tape and listen to the drums being played back while you record
a bass guitar part or whatever on track two. Play back the drums and bass while
you record a guitar part on track three and then the vocalist, would lay down
the vocal track on track four.
This process is called multi-tracking. Then you plug a RCA cable into the
master/line out of the four track and plug the other end of the cable into the
line in of a regular two track home stereo cassette deck, VCR, mini disk
recorder, CD burner, computer, DVD recorder or whatever you have to mixdown the four
tracks to two tracks (stereo). The finished cassette, CD or whatever you
mixed down to, could then be played on a regular cassette deck. Voila, there was your
finished demo tape, hopefully a hit song, ready to send out to a record label,
in pursuit of the infamous Record Deal.

Later on came the eight track cassette recorder with a $2000. plus
price tag on it, which quickly became discontinued for poor sales.
Other short lived versions were the six track and twelve track cassette
recorders. The four track cassette was finally discontinued around 2009.
Some music stores still had stock until 2011.
It was a long slow death for the 4 track, probably due to its low
cost, around $150. to $200. at the end, the cheap cost of blank
cassettes and how simple it was to use. Just push a button to play,
record, fast forward or rewind.
In the late
90's the hard disk recorder which had been around for several years
started to come down in price and led the way as the popular method for
home recording. The hard disk recorder works the same as the 4 track
cassette except it records on a computer type hard disk drive
mounted inside the case of the unit instead of on a cassette tape. You still
needed another unit to mix down to. Later on you could buy them with a
built in CD burner. They have the advantage of no tape stretching or
deterioration. The built in mixing console allowed you to adjust EQ, panning,
add reverb or delay and other effects. They also had a built in mixing buss for
effect sends. You could edit your songs, meaning you could cut and paste parts of a song just like typing on a
computer. You could play the verse and chorus of the song one time and repeat it
by cutting and pasting. Editing was a tremendous advantage, a task which reel to
reel recorders and cassette recorders could not perform. Later on the price dropped with the introduction of the
cheaper flash card to replace the more expensive hard drive.
For the last few years computer recording has
been the rave with the advent of lower cost high power computers, cheap computer
peripheral upgrades (such as hard-drives, RAM memory, etc) and software plugins. First recordings on
the computer were done through the mic input on the rear of the terminal. This
created a lot of tape hiss style noise and weak signal input. Then through the
USB port bypassing the soundcard and those problems and then through firewire
which allowed more data down the pipe greatly reducing latency (delay) on
recordings. There is a large selection of pro recording software and plug-in
modules software for effects, instruments, even bass and drum grooves played by
studio musicians, which you can use in your songs.
At this point you might be asking yourself if you are
still considered to be a musician when using these pre-programmed bass
and drum patterns, with the cutting and pasting and other computer
tricks, or are you more of a computer programmer. A lot of
musicians have been asking that question lately.
Recently the price of hard disk recorders has crashed, probably due to the
onslaught of cheap computer recording software and plug ins. The hard disc recorder manufacturers have
cut their lines to only a couple units. It looks as though they will soon be
discontinued like their cassette predecessor.
If you are starting a studio from scratch and don't have a
powerful computer or a computer you can use for long periods of time , the hard
disk recorder will be your least expensive option. A new four track
digital recorder starts at about $150., an eight track starts at about
$200. Used, if you can find them, usually go for half. Usually you can find a
used 16 track for a few hundred dollars, 24 track around $400. and up, 32 track
around $600. and up.
If you have a suitable computer and can tie it up for long periods of
time, you can get in for under a $100.
Either way you will still need additional gear such as mics,
instruments, cabling, effects etc.
by Art Rock / MyCD.ca copyright Absolute Music 2020
right click ad to open in new window
. |
|
What makes a pro
recording pro? What is the "sound" that the pros get and how can you
make your recordings sound more professional?
The simple answer is - there's no simple answer. But with careful listening
and a little experience you can create excellent results with modest equipment.
Good mixing starts ear
The first and most important item of equipment is - who knows? Anyone? It's
your ears! Sorry to tell you this, but listening to ten hours of Rave at 110dB
will do nothing for them and you might as well give your mix to a turtle as try
to mix with misused ears.
Listen to commercial recordings of mixes you like, analyse them, listen for
the effects and get to know what constitutes the sort of sound you're after.
Mixing secrets
There's no hidden secret to getting a good sound, but if we had to sum up the
secret of mixing in two words it would be this - EQ and compression. Okay thats
three words.
These are probably the two most important tools used by professional
producers. However, like any tools, if you don't know how to use them you'll be
carving Habitat tables instead of Chippendale chairs.
That's where your ears and experience come in. Here we have assembled some
production ideas, suggestions, tips and tricks but they can only be guidelines
and need to be adapted to suit your material. There are no presets you can
switch in to make a bad recording sound good. And if your original material has
been poorly recorded not even Abbey Road could salvage your mix. But follow
these suggestions and see how much your mixes improve.

Get the level right
You can't push the levels when recording digitally as you can when recording
to tape but you still want to get as much signal into the system as possible.
This means watching the levels very carefully for clipping, and recording at an
even and constant level.
Some recording software lets you monitor and set the input level from within.
Some expect you to use the soundcards mixer while others have no facility for
internally adjusting the input level and expect you to set this at source.
Monitors
Your ears are only as good as the monitors they listen to. DO NOT expect to
produce a good, pro mix on tiny computer speakers. It may sound fine on a
computer system, but try it on a hi fi, in a disco and through a car stereo.
Oddly enough, you don't necessarily need the most expensive Mic. Many top
artists use what some might call "average" Mics because they work well and get
the job done. You can spend a wad on a large diaphragm capacitor Mic (yes,
they're good for vocals) if you have the lolly but check out dynamic Mics which
are much more affordable and can be turned to several tasks.
Mixing MIDI and audio
One of the great things about computer-based recording is that the parts can
so easily be changed, edited and processed. It's also so easy to combine MIDI
and audio tracks and many musicians use a combination of sample loops, MIDI
parts and audio recording.
Audio recordings are generally guitar and acoustic instruments such as the
sax and vocals. Incidentally, the best way to record guitars is by sticking a
Mic in front of its speakers. You can DI them and process them later and this
may be cleaner but for a natural guitar sound a Miced amp is hard to beat.
It's not necessary to record drums live and, in fact, it's difficult to do
and retain a modern sound. You can buy off-the-shelf MIDI drum riffs and audio
drum loops, or program your own. The quality of the gear which makes drum noises
these days is such that anyone with a good riff can sound like a pro.
amZ
TODAYS DEALS ON MUSICAL
EQUIPMENT
AT AMAZON.CA
zzz
Mixing MIDI
As MIDI and audio parts appear on the same screen in modern sequencers, it's
very easy to arrange them into a song. However, when you come to mix everything
down there's another consideration. If you are recording to DAT you can simply
route the audio and MIDI outputs through a mixer and into the DAT machine.
However, if you want to create a CD you must first convert the MIDI parts to
audio data. The entire song can then be mixed to hard disk and burned to CD.
Converting MIDI to audio can have another benefit and that's the ability to
process the MIDI tracks using digital effects.
Effects
There are three positions for effects known as Master, Send and Insert. Use
the Master for effects you want to apply to the entire mix. These will often be
EQ, compression and reverb.
Although giving each channel its own Insert effects is kinda neat, each one
uses a corresponding amount of CPU power. So if your computer is struggling and
if you're using the same effect on more than one channel, make the effect a Send
effect and route those channels to it.
Many pieces of software let you apply an effect Pre or Post fader. With Post
fader, the amount of sound sent to the effect is controlled by the fader. With
Pre fader, the total volume level of the signal is sent. Post fader is the usual
default and the one you'll use the most.
EQ
E.Q. is the most popular and the most over used effect. Yes, it can be used to
try to "fix a mix" but you can't make a silk purse out of a sow's ear as me Grandma
used to say and what she didn't know about mixing could be written in the margin
of the book of honest politicians.
But before you start messing with E.Q. or any other effect for that matter,
make sure you have a decent set of speakers. Have we said that already? Oh, must
be important, then.
| Indy Artists 70% off
Place your AD here
contact:webmaster@mycd.ca |
There are plug-in effects such as MaxxBass which can psycho acoustically
enhance the bass frequencies to make it sound better on smaller speakers.
However, this is by no means the same as getting a good bass sound in the first
place by observing good recording principles.
EQ can enhance a mix to add gloss, fairy dust, shimmer, sheen, a sweetener
or
whatever you want to call it to the final production. It can be done with
enhancers and spectralisers, too, although these tend to mess with the harmonics
which some producers don't like. However, don't dismiss them out of hand.
General EQ lore says that you should cut rather than boost. If a sound is
top-heavy, the temptation is to boost the mid and bass ranges. But then what
usually happens is you start boosting the upper range to compensate and you
simply end up boosting everything and you're back where you started - only
louder!
The reason why cutting is preferred is that boosting also boosts the noise in
the signal which is not what you want. Try it. Boost every frequency and listen
to the result. If you think it sounds okay, fine. What do we know?
But when you're fiddling, do keep an eye on the output meter. Boosting EQ
inevitably means increasing the gain and it's so-o-o-o easy to clip the output
causing distortion which does not sound good.
Finally, check EQ changes to single tracks while playing back the entire
piece. In other words, listen to the tracks in context with all the other
tracks. It may sound fine in isolation but some frequencies may overlap onto
other tracks making the piece frequency rich in some places and frequency poor
in others.
Reverb
Reverb creates space. It gives the impression that a sound was recorded in a
hall or canyon instead of the broom cupboard. Recording lore suggests that you
record everything dry, with no reverb, so you can experiment with a choice later
on. You can't un-reverb a track once it's been recorded.
The more reverb you apply, the further away sound will seem. To make a vocal
up-front, use only enough reverb to take away the dryness. Vocals don't want to
be mushy (lyrics can be mushy) so use a bright reverb.
A common novice error is to swamp everything with different types of reverb.
Don't - it sounds horrible!
Mixing down
You've done all the recordings, done the edits, applied the effects and now
it's time to mix everything into a Big Number One Hit! Before you do, go home
and have a good night's sleep. Have two. In fact, sleep for a week.
Yes, we know you're hot and raring to go but your ears are tired. They're
falling asleep. Listen carefully and you might hear then snore!
There is a phenomenon known as ear fatigue and consistent exposure to sound,
especially the same frequencies, makes our ears less responsive to them. Goes
back to the bit about spending your life in a Rave club - you'll never be a
master producer. If you try to mix after spending a day arranging, your ears
will not be as responsive, so do them and your mix a favour by waiting at least
a day.
Now, go forth and mix! And dont forget - you get better with practice. For
more information about mixing, pick up a FREE copy of Creating The Perfect Mix
at making-music .com
Is there a specific
article topic you would like to see here? email
webmaster@mycd.ca We will try to
pursue the topics we get the most requests for. |
4) Recording Drums - Miking Techniques Part 1
Recording drums can be one of the hardest things when recording a band.
Many people are unsure what to do and how to go about it. Although when
recording drums mic placement and choice is a big issue, the biggest
issue of all is how good the drummer places. ie a solid drummer is going
to be a lot easier to record than someone who plays loose and out of
time.
Kick Drum
Lets talk about how to mic a kick drum. The kick drum is a solid focal point
behind the drums with a low end frequency that in some context establishes the
beat of the song. for this reason kick drum mics are large with a low end
frequency range. In terms of mic placement the mic needs to be placed inside the
kick drum. This means that unless the front skin has a hole in it, it should be
removed! Once you have removed the front skin place the mic about 12'' away from
the beater, slightly off-center and pointing directly at it (Placing it directly
in-front of the beater means that it is the path of the sound and puts the mic
under a lot of pressure). Use this mic placement if you want a nice precise and
punchy sound. If you want a more open sound bring the mic further away from the
beater - just on the outside of the drum. A good choice of mic generally is the
AKG D112 and Sennheiser 421, I also find that the shure kick drum mics work
great. In terms of miking a kick drum these are general guidelines and you
should experiment with you mic placement since the sound depends a lot on the
person playing the drums.
Snare Drum
With The snare drum the hardest thing is placing the mic in the right spot
since there is little room. When you position it try and place it 1'' in from
the rim, 2-3'' above it, facing to the center of the drum at 45 degrees and
facing directly away from the hi-hat. Facing the mic away from the hi-hat means
that you minimise the amount of hi-hat coming through that mic (if you still get
alot of hi-hat coming through the snare mic try and put a round peace of foam
around the mic). If you find the snare sound is not cutting through than
consider miking the bottom of the snare drum as well, if you do decide to do
this remember to reverse the phase on the bottom mic. In terms of mic choice the
shure sm57 is a great it has been used by many great engineers in the past and
still is. It is a relitivly cheap mic but still function as good or better than
other mics more expensive. There are many other good snare mics out there and
you should try them out to find what best works for you.
Jakob Culver is a professional working musician & founder of the website musiciansequipment .com
|
5) Home Recording Studio Basics
-
Here's What You Need to Record by Seth Lutnick
After I had blown quite a few thousand dollars in a recording studio, a sound
engineer friend made a cool suggestion. "Why don't you buy an ADAT, and do some
tracking at home?" So I purchased that venerable 8 track digital tape recorder
and saved oodles of time and money putting all my synth tracks on tape. That was
my start in home recording, and oh, the fun I've had since!
What are the basic pieces of equipment and software one needs to record at
home?
There are so many ways to do this! Well, since you're reading this, you probably
have a computer, so let's base our home studio on the computer. We'll start by
understanding the different functions we will need filled in home recording.
Then we'll understand what the best hardware and software products to do it are.
In general, the principle I recommend is to use fewer pieces of equipment with
more functions. That approach saves time and, usually, money. As you advance in
your recording skills, you can go for more specialized equipment.
There are two distinct phases in recording a song. One is the "in" phase,
referring to everything needed to get your music performance into a basic
recorded form, with however many tracks you need. The second phase is the "out"
phase, where you will take that raw music, process it and create the final
stereo version.
The "in" phase -- sending the music to your computer
Music can be put into your computer either as audio or as MIDI. Audio
is actual sound recordings. MIDI records no sounds, but only the digital
instructions for an instrument to play. It is much like a combination of
a pianist and sheet music. Without an instrument, he can make no music.
With MIDI, you are saving the note and volume instructions to be played
on the instruments of your choice later on.
--------
------ ------ ------ ----- ----
Although some programs let you put MIDI notes into your computer through
your computer keyboard, and other programs have music generation
features that allow you to create an entire backing band without playing
a note, the best solution is a velocity sensitive MIDI keyboard. It
gives a much more realistic performance. For example, playing a key
softer will record a softer note. Other features, such as aftertouch,
allow you to add vibrato and other realistic effects.
Audio simply means actual sounds. Audio tracks will include vocals,
acoustic instruments, and electronic instruments whose sounds you wish
to use. You will do well to get at least two microphones. Some
microphones are better constructed to record vocals, while others are
optimized for instruments. In addition, having two mics allows you to
record in stereo, or two soloists performing at the same time.
Receiving the music into your computer
All of this will get your music up to your computer's door. How do you
get it inside? With an audio interface that has: a microphone jack that
fits your microphone cable and preamp function (so that the signal is
strong enough to be properly recorded), phantom power (if you use a
condenser mic that needs it), a line input for synths and sound modules,
and a MIDI interface. Remember the principle - less products that do
more. Some find it simpler to run every audio sound, mics and all,
through a hardware mixer (with phantom power and effects) and sending
that pre-processed signal to the audio interface's line input. You'll
still need the MIDI interface function for your MIDI recording, though.
Once your audio and MIDI are inside your computer, software takes over.
For our recording we will use what's called an integrated audio/MIDI
sequencer. Famous names include Cubase, Cakewalk and so forth. These
programs record multiple tracks of audio and MIDI in perfect
synchronization.
Now you have all the equipment you need for the "in" phase. What will
you need to take the many tracks of audio and MIDI you have recorded and
make a song out of them?
The "out" phase -- making MIDI into music
We mentioned that MIDI is simply digital instructions, it is not actual
sounds. Now we will need to create actual sounds from those
instructions. There are two options for this: external and internal.
External sounds come in little boxes called sound modules (or keyboards
with their own great sounds). Sound modules have hundreds of
high-quality patches that re-create every instrument in the orchestra,
classic electronic sounds, spacey new synthesizer creations and sound
effects. To use them, you send the MIDI back out from the sequencer
program through the audio interface's MIDI output and into the sound
module. You then take the audio output from the sound module back into
your computer via the line input on your audio interface and record it
on a new audio track in the sequencer. It is now a real sound and is
perfectly lined up with the other tracks.
Internal sounds come in lots of different types. Instruments that you
use from within your audio/MIDI sequencer include VST instruments and
software synths. The latter may automatically come with your audio
interface, or require installation like any other program. Option two is
a full-blown sampler/synthesizer program, such as "Reason", that you
connect your sequencer to through a software function called "Rewire."
And there are also sound modules that come in the form of PCI cards that
you physically install on your computer.
Fine tuning and effects
Most every song will use spatial effects such as reverb and echo. You may find
that some tracks are slightly out of tune. On others, there may be a consistent
buzz that needs to be removed. For all of these, you will want to have an audio
editing program or plug-in. A plug-in is simply a function you can add to your
basic sequencer program. Plug-ins exists for all kinds of functions, including
reverb, compression, equalization, noise reduction, pitch correction and so
forth.
An audio editing program is a standalone program that does all of these things.
With most audio/MIDI sequencers, you can configure your software to call up the
audio editing program and fix the track without leaving the sequencer.
Mixing down
Once you have all of your tracks and sounds recorded, you will need to mix them
down to stereo. Again, this can be done in an external or internal fashion. To
do it externally, you would need a hardware mixer. This method limits you to the
number of tracks you can send independently through your audio interface and the
number of tracks your mixer can handle. Nonetheless, mixers give you a real
surface to work on, and often include quality studio effects, reverbs and such.
Internal mixing means using your audio/MIDI sequencer to mix down the entire
song to two tracks. The advantage of doing it internally is the expanded number
of tracks you can use. The disadvantage is the difficulty of mixing with a mouse
on a computer screen. There are, however, hardware mixing surfaces which simply
control your software program.
Mastering and burning
Once you have your stereo mix, you want to put the finishing touches on it.
These touches include overall compression, equalization, noise reduction, fading
in and out and bringing the recording up to a normalized level of volume. Your
audio editing program should be able to handle these adequately, although there
are specialized mastering programs which offer higher quality and many more
enhancement features.
Then you're ready to burn your song to CD. Odds are that your CD writing drive
came with a program that does just that and you won't need anything more. I did
mention that you'll need a CD writing drive, didn't I? Well, now I did! And if
it's MP3 you're after, most audio programs encode MP3s as well.
And that's it! Now you have everything you need to make your musical magic at
home. Have fun, but I don't need to tell you that, because it just is.
About the Author
Seth Lutnick is a singer and songwriter who has been bitten by the bug of
home music recording. His web site music. getitdone.biz
offers detailed step-by-step plans for creating a home recording studio
|
6) Studio Singing & Vocal Technique
By Tom Gauger
As a singer, one of the biggest allies in your singing career will be your
ability to perform well and do it with consistency in the studio. As a
professional singer myself singing on FOX TV, UPN Station ID's, O'Charley's and
many others, as well as a former talent booking agent with the William Morris
Agency, I can tell you that one of the biggest downfalls to most singers is
their inability to be consistent with a broad range of singing styles while
singing in the studio. It's one thing to sit behind the piano with friends, and
an entirely different thing to sing behind the mic in the studio where every
nuance and tonal inflection is heard.
So how do studio singers who've been doing this professionally for years, get
to that point of consistency, and how do they get the paying gigs and get called
on in the first place? Those are great questions, and I will take the remaining
time in this article to capitalize on concepts that most singers would likely
embrace as the truth and realistic in answering them.
To begin with, singing in the studio and singing live in front of a crowd are
two totally separate singing techniques and usually unequaled levels of singing
expertise. It's one thing to sing in front of a crowd where audibility of your
vocals is not the main concern, but the overall groove and image is.
Understanding the words on stage may or may not be a concern, but to the studio
and session singer, it's everything. You see there are marked differences in the
ways that each of these singers takes their singing ability to the stage. You
will find that many if not most singers don't do both well. The singer who is
great on stage in front of a large audience is usually not that convincing or
lyrics that easily understood in the studio. That's why jingle singers are paid
such good money. It's not easy to sing a commercial full throttle and not sound
"ricky ticky" doing it with words that are easily understood. And as a side
note, if you are interested in singing commercials, you might consider visiting
ReelMusician.com for more information and download a free e-book on jingle
singing.
So how do session singers get that consistency in the studio? Well, years of
experience are one answer, but the other part of the answer is in how they
practice. How serious are you in your dream of becoming a studio singer? In your
desires to becoming a studio singer, you must commit to consistency, be easy to
work with, and available. You might already have availability and easy to work
with in the bag, but you're still having problems with the consistency part.
Let's look at a few ideas that might help.
Finding a good vocal coach, that truly understands studio and jingle singing,
is hard to find. Most, have preconceived notions and teaching ideas and
attribute everything to a breathing technique of some kind. I'll tell you the
truth. I've met fantastic singers who breathe in a number of different styles,
yet they are consistent as the day is long. Now I'm not suggesting that there
aren't better or proper breathing techniques out there, I am suggesting that
many if not most vocal teachers, teach from a textbook style and not from a "I'm
going to figure out your strengths and abilities and zero in on a workable and
credible game plan that outlines a singing technique career pathway for
longevity," style. There's a big difference. The teacher who teaches out of a
textbook and the teacher who is already been out there with success under their
belt, no matter what business or job, has my attention and certainly should have
yours. Find a credible and reputable singing coach.
You will want to practice your singing in the shower, the car and even in a
closet or close up to a wall where you can hear what you're singing. Ultimately,
being able to record your voice, even onto a cheap cassette or into the computer
to hear your progress or areas that you immediately recognize needing
improvement, is the best way to go. This alone, if you take time out on a
regular basis, will improve your singing far beyond what most vocal coaches can
or claim they can do. Because of your vested interest and now your ability to
hear and figure out what needs to be changed and corrected, will be the igniting
factor in your singing career and goals of consistency. Certainly don't ignore
or reject the notion of finding a qualified vocal coach, but understand that
America was founded on entreprenualism and not the textbook way of doing things
and this includes your singing career as well. A good vocal coach will recognize
and ultimately push you in the right direction as well by hearing and giving you
exercises to correct singing deficiencies.
Get connected with session singers, and perhaps even try to take vocal
coaching lessons from one of them. You will have to flexible as their session
work will not always be easy to predict, but well worth any inconvenience. This
will increase your odds of obtaining session work, and now you will be working
with an individual, like we just mentioned, who is actively in the business and
so pure textbook teaching will most likely not be in their philosophy and
thinking.
Lastly, and I apologize and wish we had more time in this article, maintain a
good attitude and an easy to deal with personality. Singers and producers like
individuals who are not only fun, but they're easy to deal with and who always
come to the session with an uplifting spirit. You may visit ReelMusician .com for
more articles and advice on this and other topics.
About the Author
Mr Gauger is a former talent booking agent with the William Morris Agency and
jingle singer singing on FOX TV, UPN Station ID's, O'Charley's and many others.
In addition, Mr Gauger is a TV and radio writer and can be contacted at
reelmusician.com or tgauger@ reelmusician.com or 615-300-5030.
amz
TODAYS DEALS ON MUSICAL
EQUIPMENT
AT AMAZON.CA
|
7) Sing Powerfully Without
Strain or Vocal Blowout by Jennifer
Truesdale
Have you ever had a voice teacher tell you if you sing _______ insert your favourite genre of popular music here. . . Rock, Blues, R&B, Gospel, Musical
Theatre you’ll ruin your voice? I’ve spoken to more singers than I can count
who’ve had this experience and it’s distressing! It can also cause singers to
shy away from vocal training.
Well, I’m happy to tell you that this does NOT have to be the case.
Certain styles of music use a vocal styling that some call singing “hard”
while others call it “belting”. Whatever you call it, the bottom line is that
these styles of music call for vocals that are full, rich, and yet natural
sounding. While this style of singing may be more vigorous it CAN be done
without hurting your voice. It’s not the sounds you make it’s the WAY you make
them. Let’s look at this in more detail.
1) Singing “hard” works your vocal muscles more vigorously. However, it’s not
this vigorous workout that creates vocal fatigue and blowout, muscle tension and
manipulation are the offenders.
This muscle tension can occur in various parts of your body including your
lips and face, tongue, jaw and abdomen, which then creates tension in your
throat. After singing with this extra effort for a period of time, the tiny
muscles that create your sound become exhausted and voila! vocal fatigue or
vocal blow-out. If you knew how to let your voice work free of muscle tension
and manipulation, you could sing the way you want (sound and style) without
hurting your voice. Eliminating these types of muscle tension will help your
voice work freely and will help you to sing for long periods without fatigue or
hoarseness.
2) In addition to muscle tension and manipulation there is another major
cause of vocal blowout - pushing out TOO MUCH air when singing.
Making vocal sound requires breath. Some sounds require more or less breath
than others, but whatever sounds you’re making, your vocal instrument requires a
proper balance of air to work effectively and easily. This balance is dependent
upon a well-regulated (controlled and varied) air stream. If a singer forces out
too much air, his vocal instrument will be thrown out of balance and
consequently, the muscles react by tensing. From there, manipulation tends to be
used to create the sounds that would have been so much easier if the correct
balance of air had been used.
Achieving a well-regulated air stream isn’t difficult but it does require
proper exercises all of which are taught as part of the Deva Method®. This
method has found the key to achieving a natural and automatic regulation of air
so that you don’t have to think about breathing at all. It allows you to better
trust your voice and to know that you can put your all into your performance
with self-confidence that your voice will do what you want it to do.
3) Most singers I talk to know the importance of warming up their voices
before singing. However, what a lot of singers don’t know is the importance of
cooling down their voices AFTER singing. It seems logical enough, but is often
missed.
If you think of yourself as an athlete, it makes a lot of sense. After all,
would a runner, immediately after running the marathon plop himself down on the
couch? He may WANT to, but the runner knows that if he doesn’t cool down his
body, by stretching, walking, etc, the muscles of his body will stiffen. The
same holds true for the muscles that create your sound. A good vocal cool down
gets the muscles that are used to create sound back to their normal resting
state.
4) Lastly, some vocal styles simply require more vocal development than
others. Strong, hard hitting sounds can be created easily when the muscles are
well developed through proper vocal exercise. Would that same athlete attempt to
run a marathon without training for it first? A good athlete knows that he needs
to exercise his body first and develop the muscles necessary. So in addition to
all that I’ve mentioned above, know that correct vocal exercise is another very
important step that you can take to enable yourself to sing the way you want
without vocal fatigue and blowout.
While private vocal lessons are the best approach to developing your voice,
we do offer some very effective home study materials and vocal technique
seminars. I highly recommend the Deva Method Vocal Warm-ups and Cool Downs CD
which is available on our website (see below) or by calling Jeannie Deva Voice
Studios at 617-536-4553. You can also receive, FREE of charge, a booklet of our
most recommended vocal warm-ups and cools downs. Simply go to our website
DevaStudiosBoston .com for more information.
I wish you much success!! Please feel free to contact me at the above number
or at Jennifer@ DevaStudiosBoston .com if you have any questions. I’m here to
help!
Copyright 2006 Jennifer Truesdale. All Rights Reserved.
|
8) Preparing For Your Recording Session
by John McKay
Recording is a time-intensive experience, and problems that arise often seem
magnified. No one wants to wait for an hour while the guitar player runs to
Guitar Center for new strings. So, to keep things going smoothly and
efficiently, here are some things to do in preparation:
1. Practice! You'd be surprised how many bands come into the studio obviously
unprepared. If you can't play through the song without making mistakes, then
you're not ready to record yet. Take the time to practice the songs you want to
track thoroughly. This isn't to say that you can't be creative in the studio,
but it's a lot cheaper to be creative on your own time.
2. Make sure your songs are finished. Going into the studio hoping to finish
lyrics or parts on the spot is a recipe for dissatisfaction. You may be inspired
by the pressure, but you'll inevitably listen back to it later on and think that
you could have sang it better, or that you don't especially like this line or
that phrase.
3. Record yourselves. It's very useful to record your practice using a simple
tape recorder. The finished product won't sound very good, but you'll be able to
hear if you're off time, or off key. It may also make you aware that some parts
of your song are dragging, or that other parts could be extended or more
developed.
4. Get your gear in shape. Don't show up for a session that you're paying for
with gear that doesn't work, cables that cut out, batteries that are going dead,
or blown speakers. If you're afraid that your gear is less than perfect, make
some calls. You engineer can point you to some people in town that rent gear on
a day-by-day basis, or to other musicians who might be willing to loan an amp or
cabinet for a day or two. It makes a difference!
5. Tune your instrument. Drummers should put on new heads about 1 week before
the session. The snare head should be replaced immediately before the session,
and if you're doing more than one or two songs, consider bringing extra snare
heads. Nothing sounds as good on tape as a fresh snare head. Guitarists should
put a new set of strings on a few days before the session. Bring extra strings,
as you probably will break one or two. Bass players can replace their strings,
although new bass strings can be a bit overly metallic. I recommend changing
bass strings a week or two before the session.
6. Let people know you're busy! You don't want to be called in to work
half-way through your session. Everyone involved needs to clear their schedules.
Nothing creates more tension in a session than someone wanting to blow out early
so they can hit some party. Also, if you're recording at your home, make sure
your family knows about it. Take phones off the hook, recording will require
some degree of quiet. If you're working at your practice space, make sure the
neighbors know that you'll need some quiet, if there are other bands at your
facility, ask them for their schedules, and work out a time when they won't be
playing in the next room.
7. Have a plan. It's always better to have fewer songs to finish, and to know
precisely which songs you're trying to get done. Often, once a session gets
rolling, it's easy to just go ahead and track some of the other songs you have.
While this isn't terrible, in my experience these tracks are usually discarded,
as they haven't been thoroughly practiced, and may not even be complete.
9. Develop a vision. I like to come see a band before I record them, just to
get a feel for their sound, and develop my vision for the session. If you
envision your record sounding like the latest MTV hit, you may be frustrated and
disappointed. Your band is unique, and my goal as an engineer is to find what's
best about your band and accent that. Your record may not sound like anything
that's come before, and trying to cram it into a pre-existing notion of a "good
recording" doesn't do it justice. The Pixies didn't sound like anything that
came before them, nor does Modest Mouse, or the Beatles, for that matter.
8. Relax! Recording is fun, and there's really no pressure. Just be prepared,
and you'll have a smooth, enjoyable session with a great product at the end!
About the Author
John McKay is the owner of Suitcase Recording, in Phoenix, AZ. He has over 15
years of experience recording bands, from punk to surf to indie to hardcore. He
does the majority of his work on location, at the artist's home or rehearsal
space. He has also performed in several bands, and has toured the US
extensively.
|
| 9)
Tips for a Great Recording Session
You know your songs are great and so does your girl/boyfriend, family,
pets etc, and you finally decided to record an album in a real studio.
That's great! But what actually happens when you get there?
When you finally do pick the perfect studio, one that you feel comfortable
at, there is a certain routine that must be followed in order to get the best
performance and the best recording for your budget.
1. Tune Your Instruments. This also includes your drums and any
tuneable
percussion instruments you may have. There is absolutely nothing worse in the
world than to have a perfectly written song with a perfect performance be ruined
because someone didn't take an extra 2 minutes to check their tuning. Tuning
takes a few minutes; a recording lasts forever.
2. Be Well Rehearsed. You'll be surprised how many bands suffer shock when
they get the final recording bill. The main reason for this is because they
confuse rehearsal time with recording time. Rehearse at home, in the garage, at
your uncle's house; anywhere but at the recording session. When you arrive at
the studio, you should know your songs inside-out and be ready for the red
light.
3. Practice with a Click Track. A lot of drummers aren't able to play with a
click track. Make sure yours can. A click track is essential in getting a good
basic rhythm track that the rest of the band can lock in to, and to sync-up
loops and delay times.
4. Be Early. Many studios start charging their clients from the exact time
agreed to in the contract. Just because you decide to show up late, doesn't mean
that the studio should give up that time for free. Be early and be ready to go.
5. Get the Sound Right. Never, ever try to "fix it in the mix". It doesn't
work like that. Take an extra few minutes to tweak the sound before recording
it. Turn that knob, tighten that string, have another sip of water. Remember
again, tweaking may take an extra minute, but the recording will last forever.
6. Know When To Quit. Recording often leads to diminishing returns. Spending
20 hours in a row at the recording session isn't going to make your song twice
as good as spending 10 hours. This rule also applies to mixing. If you're tired,
call the session and come back the next day fresh and ready.
7. Record Alone. Don't bring your friends, family, parents or anyone else
into your sessions. As fun as it may be, you are there to do a job and record
the best music possible. If you are a millionaire, then by all means, have a
party at the studio, but don't count on getting anything done.
8. Mix and Match. After letting the engineer do the first rough mix alone
(which he should) do an A/B comparison of your mix to some of your favourite CDs.
Remember that the production CDs you are listening to have already been
mastered. But it's a good way to compare levels and panning.
9. Bring Spares. Always bring spare strings, drum heads, bass strings, water
bottles, throat lozenges, etc to a session. You'll always need the one thing you
forgot to bring, so bring it all and leave them at the studio until your
recordings are finished.
10. Have Fun! This is THE most important point of all. Creating and recording
music isn't rocket science. Although there is a science involved, you should let
the engineer worry about that. If you're not having fun, then you're in the
wrong business!
2004 Richard Dolmat (Digital Sound Magic)
About The Author
Richard Dolmat is owner, engineer and producer for the Vancouver based recording
studio Digital Sound Magic. Visit his site a digitalsoundmagic .com

|
| 10)
The 5 Most Common
Questions About
Music Mastering Music mastering is an essential part of every hit record. Yet, few new (and
even some established) musicians have a good understanding of what mastering is
and why they need it.
This often leads to many selecting the wrong mastering studio and making many
unnecessary mistakes in the recording and music mixing phases (which affects the
mastering later on).
This is why below are the 5 most frequently asked questions about music
mastering:
1. What exactly is music mastering?
Mastering is the final phase before your CDs, Vinyls, DVDs or MP3 files are
produced. Its the last chance to get the sound right and for errors to be fixed.
Mastering transforms your music from a raw sound into a professional,
radio-ready sound. It gives your tracks punch, loudness, clarity, and completes
your final vision.
2. Why is it so important and do I really need it?
All major labels have their artists records mastered before theyre released.
But, often many independent artists/labels wonder if they should go-ahead and
get it done.
The answer is a big YES! If you want to make the right impression, then at a
minimum you need to get your demo professionally mastered.
Because just think about when your demo hits the A & R managers desk, whats
going to stand-out the professionally mastered demos (yours) or the poor quality
ones?
By having your music mastered, then youre going to increase your chances of
getting signed and creating loyal fans.
Moreover, the single biggest advantage professional mastering offers are the
fresh skilled and independent ears put to your music.
Because after working on your music for long hours in the studio, you often
become too close to your work. And, as a result, your ears cant help but get
used to mistakes.
Your ears begin to hear mistakes as normal. Its the same effect as when you
are living near a heavy-traffic street - after living their for a few weeks, you
will not wake-up anymore at night because your ears get used to those sounds and
blends them out.
With the mastering engineers help, you make sure you don't have any major
errors in your music and gain advice from an experienced professional in what
needs to be done to help get the perfect sound!
3. How much should I pay?
Mastering studios charge a wide range of fees. You can pay anywhere from $5 a
track or up to hundreds of dollars per hour for the most well-known engineers.
The reason there's such a large amount of fees is that there are many budget
studios that have arisen online. These studios are often a single person who
does all his or her work on the home computer.
Since these people usually do not have much experience, they often miss
important problems and do not know what to look for (every track has its own
unique problems). Additionally, they do not have tools a professional mastering
studio offers to do it right.
This is compared to the more expensive engineers who have years of experience
and know-how in creating a hit sound.
4. How important is the mastering equipment?
Professional mastering studios spend thousands of dollars on their equipment.
The equipment gives them full flexibility in making a wide-range of adjustments.
However, when looking at the equipment a studio has, you should not focus too
much on it. Instead, and more important, you want to look for an engineer who
also has experience with it.
It takes years for an engineer to feel fully comfortable with all of the
equipment and the adjustment it allows. This is especially true when learning
how to adjust for different genres of music.
| Place your AD here
contact:webmaster@mycd.ca |
For example, the equipment is often used differently for Rock music than
Classical.
5. Should I use an online or offline mastering studio?
Online mastering is a recent phenomenon. It has only been in the last few
years that it has really begun to take off.
There are now hundreds of different people offering mastering services via
the internet. Many of these people are amateurs (and can actually make you music
sound worse). While, at the same time, some of the most famous and well-known
engineers have now moved online.
Online mastering offers many advantages over offline studios. These include
the speed at which you can transfer your music and communicate with the
engineer. You are not stuck with the time-limitations a booked session in a
offline mastering studio has.
Additionally, you also do not have to deal with weeks of waiting to go back and
forth with the engineer using snail mail or booking several times in the studio
for revisions. You can also get access to the engineer anytime using email.
In an offline studio when working via snail mail, it may often be hard to get
a hold of the engineer to share your ideas.
Moreover, an online mastering engineer has experience with more international
music. In offline studios, the engineer often only works with a certain type of
music that is popular in the area.
Musicians! Get the edge by giving your tracks the "Big label" sound with
professional mastering! Get the full scoop on what mastering is, why you need
it, and where to get it without getting ripped off by
visiting masteringcentral .com right now!

|
| 11)
The Two Conflicting Paths of the
Mastering House
There are two directions you can take when producing your music. Although
both begin with weeks, months or years (and lots of money) spent getting quality
work inside the recording and mixing studios, they diverge upon arriving at the
mastering house.
The first path looks tempting at first glance. It’s where you decide to get
your mastering done fast and cheap. And mastering is only seen as something you
do as a last minute step to catch errors and make small adjustments that aren’t
extremely necessary.
However, the lure of this path eventually wears off. You soon discover this
road isn’t as smooth as it once looked, as the reality of having to compete
among thousands of other artists hits you.
Of course, few artists choose this path because they want to. But, they just
don’t know what can be achieved during the mastering process with a skilled
mastering engineer. And so the cheap guy seems like a pretty good deal.
As a result, their albums lack that certain "Edge" to stand-out over others
in the marketplace. And they are less likely to catch on.
Not only in the short term because their music fails to capture as much
attention as it could… but, also in the long-term as fans soon forget about your
album if it isn't "up to par".
This is compared to the second, less traveled path… where the "Golden sound"
lies (and more record sales as a result).
Instead, of being a last-minute effort, mastering is given more respect and
attention. It’s where the artists are actively involved in discovering what can
be achieved. They work one-on-one with a skilled mastering engineer and describe
exactly what they want their final vision to sound like.
The engineer then offers feedback (based on years of experience) and adds the
"Polish" that brings out the greatness in your music so it remains in fans’ CD
or record players for years to come.
Simply put, this path is the way to go! In the end, it’s actually a lot more
expensive to go with the "cheaper" mastering house. And, if you want your music
to be remembered as one the greats by your fans long into the future, then don’t
hold-back on mastering."
Keywords: mastering, music production, mixing, recording, producing, artists,
bands, mastering house, mastering studio, mastering engineer
About the Author
Hans Klein, Greensboro, NC
More Details about masteringcentral .com here. Musicians! Get the edge by
giving your tracks the "Big label" sound with professional mastering! Get the
full scoop on what mastering is, why you need it, and where to get it without
getting ripped off by visiting: MasteringCentral .com right now!
|
| 12)
The Role of CD Mastering Engineers
by Thomas Morva If a recording artist has any hopes of their songs being played on the radio,
it is vital that their rough mix is mastered well. Often the best way to do this
is to hire a CD mastering engineer. Professional CD mastering engineers can make
a decent mix sound good and a good mix sound amazing. There are several things
that CD mastering engineers do. Engineers work with the artist to decide what
order the songs will appear on the CD, and they equalize the volume of the
different instruments in each song and across the whole CD. CD mastering
engineers can also add more definition and clarity to the instruments on a song.
They then adjust the intros and ends of songs, choosing length of time between
songs and adding cross-fades or other effects if need be.
The order in which songs appear on a CD can greatly affect the way the CD
progresses when played. If similar sounding songs are placed consecutively on a
CD it can suggest shortcomings in the songwriting or make listeners believe the
artist has a limited range. Also, some CDs can tell a narrative if sequenced
correctly. Ultimately, it is up to the CD mastering engineers to work with the
recording artists and choose the song order on the CD.
It is important that the instruments within a song and the songs on the CD are
at an appropriate volume level. Within a particular song, the different elements
must be mixed appropriately in order for the song to sound good. The mastering
engineer can give clarity and definition to the different instruments in a song.
The engineer also has the task of assuring that volume levels across all of the
songs are similar, to help the CD sound more cohesive while still leaving room
for dynamics.
CD mastering engineers also determine
how much time there should be between songs on the CD. They fade and cross-fade the intros and endings of songs to make
them flow better.
CD mastering engineers have the task of making a rough mix of a CD ready for
public consumption by adjusting audio levels and pacing the tracks in a way that
brings out the best in the material.
About the Author
cdmastering .com provides
detailed information on CD mastering engineers, facilities, and
software, as well as online and free CD mastering.
|
| 13)
Audio CD Copiers
by Kent Pinkerton Special copiers are available for duplicating audio CD and can copy multiple
CDs from a single original or master CD. The master CD is copied onto several
unwritten blank CDs. Audio CD copiers need software to copy or burn the CD, and
depending on the program, a number of CDs can be burned at the same time.

Software programs also enable file conversions. Audio files have extensions
such as Mp3, wav, ogg and audio CD. There are software programs, which can
perform required file conversions. Audio files can be encoded into Mp3, which
occupy less space and can be copied faster. Later these can be decoded into
audio formats to be played on players such as Windows Media Player, WinAmp, Real
Player, etc.
Audio CD copiers use burning technology. CDs are coated with a dye. A laser
head in the copier selectively burns this dye. This copies the audio file on the
CD.
Earlier CD copiers were manually operated. They required the user to open the
shutter when one CD was copied and to load the other CD. Naturally, they were
very slow, with speeds rarely going above 8x. Modern audio copiers are
standalone or PC attached. Standalone audio CD copiers do not need a PC
connection, and they have a hard disc of their own. They are actually a
combination of several CD copiers, which can simultaneously copy CDs. They also
have a robotic arm, which can load CDs as they are being copied. Hence,
standalone CD copiers are also called as hands-free copiers. They can copy as
many as 150 CDs in an hour.
Audio CD copiers are very useful for people who wish to distribute audio
material through CDs. Music companies use such copiers to duplicate CDs.
Depending on the quality of the CD copier, the duplicated CD may be almost as
good as the original. Copying CDs is an economical method for producing bulk
number of audio CDs.
About the Author
e-cdcopiers .com provides
detailed information on CD copiers, CD DVD copiers, CD copier software,
CD copier downloads and more.
| Place your AD here
contact:webmaster@mycd.ca |
|
| 14)
Copy CD's Like A Professional
by Colin Klinkert
Anyone who has burned CDs in the past has had to have encountered this
problem - your CD doesn't want to play in certain CD players. You've probably
tried switching to a different brand of disks, switching the writing speed of
your CD burning software, and yet nothing seems to work.
Most professional CDs that are purchased from a retail outlet such as Circuit
City or Best Buy works in any type of CD player, which probably makes you wonder
what they are doing that your not. All of us wonder this, especially when out
duplicated CDs don't want to play back like they should.
Much to the contrary, it's because the music industry burns their CDs
differently. Instead of simply duplicating CDs, the music industry chooses to
replicate CDs. Even though the terminology may seem synonymous, the process is
actually totally different.
CD replication is used for the mass production of CDs, which is normally more
than 500. Instead of writing the data to a CD using a laser as with duplication,
CD replication uses a glass master to stamp (or press) the data onto the disc.
This helps to eliminate almost all of the issues associated with play ability
that are encountered when burning CDs at home. CD replication is a far superior
process of burning CDs.
Important to note, is the superior quality of CDs that are pressed using
replication doesn't come cheap. Even when using independent CD duplication
companies such as Absolute Disc or Oasis, there is still going to be a very high
cost associated with the replication of disks.
For your next project, try having your CDs replicated rather than duplicated.
This will ensure your project is very high quality, even though you'll need to
order more than 500 CDs to receive this process.
About the Author
You can find other sites containing valuable information by visiting
the sitemap of these informational sites everythingclub .com
Hal Leonard Sheet Music
|
| 15)
Can't I just do my CD and DVD duplication
at home?by Jason Cole
You've just created an mp3 audio album that you want to make CD copies of, or
maybe you have a collection of home video clips you'd like to burn to DVD and
pass out to your friends. As far as you know home CD album duplication and DVD
duplication require just a couple of things; a computer with a burner, CD-Rs
and/or DVD-Rs, and the proper software. I have all that, so why can't I just go
ahead with my home CD/DVD duplication project? Here are a couple factors to take
into consideration before you jump into your disc duplication project.
1. Speed/Volume
With your home set-up, you can burn CDs and DVDs one at a time, and you have to
reload the burner manually. This is fine if your disc duplication project only
consists of 1-10 pieces. (CDs or DVDs) Considering that burning one disc at 24x
speed takes between 3-5 minutes, to burn a large amount of discs, you're going
to have to have a lot of time set-aside. Professional disc duplication
facilities use multi-drive, auto-loading machines that can burn up to 8 discs
simultaneously. This cuts down on the total cost of your CD or DVD replication
package, and saves you the headache.
2. Quality
In addition to a certified maximum burn speed, CD-Rs and DVD-Rs all have
physical parameters and properties that must be taken into account. To get the
absolute best quality out of your CD album duplication or DVD disc replication
project, you must follow certain guidelines. The guidelines are explained in the
"Red Book" of audio, one of a set of color-bound books that contain the
technical specifications for all CD and CD-ROM formats. Most professional CD /
DVD duplication / replication houses follow these guidelines, and will produce
better quality discs more often than not.
By all means, this article should not stop you from duplicating your CDs and
DVDs at home. This is just here to educate you a little bit more about what the
big guys are doing, and why it costs a tad bit more to get your discs duplicated
by them.
About the Author
Jason Cole and diskfaktory .com offer
great tips and information regarding CD DVD Duplication, in addition to
providing excellent CD and DVD duplication services. Get the information
you are seeking
|
| 16)
Is Your Band Ready For CD Duplication
Or CD Replication? by Blake Stoffregen
It's a typical situation. You've been putting a lot of energy in your craft
and people are starting to talk about your band. You've played a few shows and
everyone is asking for a CD. I used to think that in order to release your own
CD you would go out and play a bunch of shows and then someone would come out
and sign you. They'd take care of everything. They'd set up the recording
studio, organize the artwork, and pay for it to get manufactured. That's not the
case these days.
At present, technology is readily available for any budding musician to
record, create, and duplicate CDs. CD duplication involves CD-R media. CD-R
prices have dropped dramatically since the first CD Recorders were available on
the consumer market. This makes it an affordable option for anyone who wants to
copy their own CDs and pass them on to friends, family, or fans. This is a great
option for the young band that is still getting their feet wet in the music
industry. Duplicating a limited amount of CDs can keep a limited budget in
place.
If your band is at the point were your ready to start selling your CD your
best option is to make a retail-ready CD and having it replicated. What is a
retail ready CD? These are the same CDs you find in the music stores by the
major label artists. They have great artwork printed on CD inserts, a nice tray
card insert, silk screened art on the CD, and they are shrink-wrapped.
The retail-ready CDs are not duplicated, but Replicated. This means that an
exact replica of your CD master has been stamped out on all of the CDs. CD
Replication is the way to go if you are serious about selling your music for
profit. In fact most music stores will not sell duplicated CDs. Think about it
this way. It is illegal to sell or profit from duplicating copy written
material. If you tried to sell CDs that have been duplicated to a retail store
you'll more than likely get turned down. How are they to know that it is really
your band? One of the best anti-piracy practices that CD manufacturing plants
have instituted is the verification of copyright and ownership through a
International Property Rights Form. Filling out an I.P.R. form ensures the CD
Replication plant that they are not infringing on anyone's copyright.
CD Replication not only shows that you value your art enough to have it made
retail-ready, but also cost effective. I'll break it down in general.
DIY CD Duplication
· 1 Computer with CD Recorder · 100 Memorex CD-R · CD Jewel Cases · Printer
Ink · Man Hours
Total $1495.00
Typical CD Replication Package
· CD Replication for 1000 CDs · 1-3 color on-disc silk-screen imprint · CD
Jewel box, assembly, professional quality film-wrap · 2 Panel Insert and Tray
card · Bar Code
Total $1000.00

These prices are very approximate and are only used for the purpose of
estimating the difference between CD Duplication and CD Replication. Lets dig in
a little bit. I've already illustrated some of the benefits of CD Duplication
and the benefits of CD Replication. You can see above that you are spending
approximately $500 more taking on the CD duplication responsibilities yourself
and only getting 100 CDs!! Having your CDs Replicated costs less and someone
else is doing the work. You can spend the time you'd spend on CD duplication and
practice your chops or promote your upcoming CD release party, saving yourself
$500 that you can use for items like merchandising, t-shirts, stickers, and
posters.
Whether you choose CD Replication or CD Duplication, you'll need to do some
research. There are plenty of resources available for CD Duplication and you
probably own everything you need. It is up to you and your band to decide which
option is better depending on what level you see your band on. Are you a band
that plays parties or small clubs, or is your band seasoned and touring? There
are benefits to both. Find a local CD manufacturer in your area and ask for
their recommendation. Most CD manufacturers also offer quick turn high quality
CD Duplication with printing on the CDs. Keep rockin'!
About the Author
Blake Stoffregen writes for various websites including crystalclearcds.com
Crystal Clear Sound offers cd duplication and replication services from one off
cds to retail ready cd replication.
In the last decade, there have been great
advances in guitar related technology,
particularly in the areas of amp, cabinet and
stomp-box simulation. In the past, a great
guitar sound was reliant on having a solid amp,
a quality microphone and a decent studio or
room. These days, with a simulation unit such as
a Line6 pod, and a PC, you can digitally record a
convincing guitar sound in your own bedroom.
This has been a God-send to musicians who don't
have the money to acquire an expensive amp, or
don't have a studio to be able to crank that amp
to the kinds of volume needed to capture a
classic guitar tone. Although this approach
produces a very realistic replication of a
guitar amp, the purists will always insist on
the superior warmth and presence of sound
physically blasted out of a speaker.
When it
comes to miking a guitar amp, there are quite a
few slightly different approaches. It is
standard practice to use a dynamic microphone.
Dynamic microphones are robust, cheap, do not
require a separate power source and are great
for close proximity miking. This is because they
can can handle the high sound pressure levels
blasting out from the speaker. 2 of the most
commonly used dynamic mic models are the Shure
57 and the Sennheiser MD421. Condenser
microphones on the other hand are sensitive,
expensive and need a power source. These are
also very useful for recording guitars, but it
is more common to set them farther back, away
from the amp so they can capture the sound and
ambiance of the room. Guitar amp cabinets are
composed of different numbers of speakers,
usually 1,2 or 4. The speakers themselves may
all sound slightly different, so it's worth
experimenting by listening to the sound of each
speaker miked separately.
These are the most commonly used techniques
in miking guitar amps:
1. Using a single dynamic mike close to the
speaker.
The microphone is placed facing directly at the
speakers center, so that it is almost touching
the grille cloth. Keeping it at that proximity,
the mike can then be moved along the radius of
the speaker, from the center to the edge.
Varying where along the radius the mic is
placed, will affect the tonality of the recorded
sound. Placing it in the middle will result in a
bright, punchy sound, whilst the closer the mic
gets to the edge, the darker the tonality
produced.
2. Using a single dynamic mike, 6 - 12 inches
from the speaker.
Use the same technique described in the first
example, but position the mike further away to
capture room ambiance. This will also result in
a more developed sound. 
3. Using multiple close dynamic mics.
Recording the amp with different mics and
blending the sound will result in more dynamic,
richer tone. A good idea is to try placing one
dynamic mic dead-center to a speaker and another
on the edge. You could also try putting mics
across multiple speakers if you have a cabinet
with more than the single speaker. It's also
worth tilting one of the mics slightly off-axis,
as this will give another variation to the
sound.
4. Combination close and distant mics
If you own a decent condenser microphone this
method is ideal. Place the dynamic mic(s) close
to the amp as described in the example above.
With the more powerful and sensitive condenser,
position it anywhere from 6 inches to a few feet
away. It will probably take some experimentation
to find the best result. With the separate
signals you can then choose to blend them or
keep them on separate tracks.
5. Front and Back miking of open-backed combo
amps
Place a dynamic close as described in method 1
or 2. Then place a condenser a small distance
behind the amp as opposed to in front as
described in the previous example. It's usual to
blend the 2 sounds, but keep in mind that this
is an advanced technique, and it can introduce
phase issues which take some audio engineering
skill to deal with.
When recording your guitar sound, it's best
to try to record as "dry" as possible. The
reason for this is that once the guitar signal
has been recorded with the effect, it's
impossible to remove it. You could be in a
situation where the guitar track is recorded
with an effect and then in the final mix-down,
the track doesn't fit in with the rest of the
instruments. Of course this does assume that you
have the outboard equipment and ability to add
quality effects to the final mix. But it is a
good concept to keep in mind and most
rudimentary recording set-ups feature some kind
of effects send channel. This basically means
that you can plug your dry recorded guitar track
into an external stomp-box or effects unit and
re-record the result to a new track. It gives
you much more control over the finished product.
If you are interested serious guitar learning
courses, we test and review web and DVD based
guitar instruction courses
Enjoy and all the
best with your strumming, picking and shredding!
Article Source: EzineArticles.com/?expert= Tony_J_McManus
-
------------------------------------------
----------------------------------------------------------------------------- Why is it Free and how you can support us.
All the articles and info on all the pages of our site, we
provide is completely free to you. We get very small payments from the
advertisers on our website when you make a purchase from them, after clicking
one of their ads on our site such as Amazon, Ebay, Walmart etc. You won't pay
any extra for your purchase and you will help us keep it free to you. We also
get a very small payment when you click on an adsense by Google ad
|